
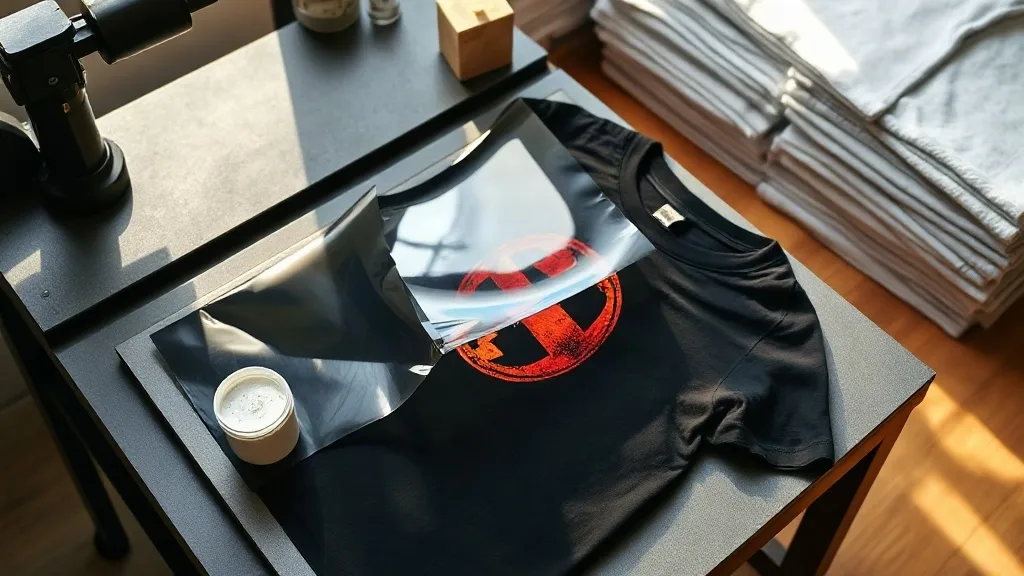
Most people who print shirts for a living eventually hit the same wall: a customer wants twelve pieces in six colors, on three different fabric types, delivered by Friday. Screen printing punishes small runs, vinyl feels stiff on anything with stretch, and sublimation only plays nice with light polyester. That gap is exactly where dtf transfers have quietly become the default answer for shops that need flexibility without babysitting a press all day.
I have spent the last few years running small batch orders through a desktop DTF setup alongside a manual screen press, and the lessons have been mostly practical rather than theoretical. This guide covers what the process actually does, where it earns its place in a workflow, and the mistakes that cost me the most material early on.
What a DTF Transfer Actually Is
A DTF print starts as a digital image printed onto a special PET film using water-based pigment inks. While the ink is still wet, a thermoplastic powder is dusted over it and shaken off, leaving powder stuck only where ink landed. The film then goes through a curing step, usually a heat press or a dedicated shaker oven, which melts the powder into a flexible adhesive layer.
What you end up holding is a thin, slightly tacky sheet you can store flat in a drawer for months. When you are ready, you place it on a garment, press it, and peel the film away. The ink and adhesive stay behind, bonded to the fabric. There is no screen, no weeding, no color separation, and no minimum order beyond how much film you feel like printing.
Why the powder matters
The adhesive powder is the whole trick. It is what lets a print stretch with a cotton-poly blend instead of cracking when the wearer bends an elbow. Skip proper curing and the powder stays grainy, which shows up as a rough, sandpaper texture and a print that peels from the edges after a few washes. Cure it correctly and the surface feels smooth, almost like the ink has fused into the weave.
Where DTF Beats the Alternatives
Every decoration method has a sweet spot. DTF's is the messy middle that other processes handle badly.
- Short runs with full color. A one-off shirt with a photographic gradient costs the same per piece as the hundredth shirt. Screen printing would need four or five screens and a setup charge that makes the single shirt absurd.
- Dark and colored garments. Unlike sublimation, DTF lays a white ink base, so bright artwork reads correctly on black, navy, or forest green.
- Awkward fabrics. Canvas totes, nylon jackets, and cotton-poly hoodies all accept DTF without the adhesion drama that vinyl sometimes brings.
- Storage and batching. You can print a week's worth of designs in one sitting, stack the films, and press them as orders arrive. That decoupling of printing from pressing is a real scheduling advantage for a small shop.
The tradeoffs are equally real. Very large solid areas of white ink can feel slightly heavier than a screen print, and the per-piece cost only starts competing with screen printing once you pass a few dozen units. For a 500-piece run of one design in two colors, screens still win on price.
Choosing a Blank That Holds Up
Print quality is only half the equation. A perfect transfer on a shirt that shrinks two sizes or pills after three washes is still a bad product, and the customer blames the print. This is where blank selection deserves more attention than it usually gets.
I keep a rotation of mid-weight blanks for client samples, and shaka wear has earned a spot in that rotation for heavyweight tees and hoodies where the fabric needs to hold structure under a large chest print. Heavier cotton handles the press heat without scorching as easily, and the tighter knit gives the adhesive more surface to grab. Lighter, looser knits can work, but they demand a gentler press and a closer look at the peel temperature.
A quick test before committing to a full order: press one transfer on a scrap of the actual garment, wash it twice inside out, and inspect the edges. If the film peeled cleanly and the print still flexes without cracking, the blank and the dtf film are compatible.
Press Settings That Actually Work
Every film supplier publishes a temperature and time, and every one of them is a starting point rather than a law. The variables that matter most are pressure, peel temperature, and whether you pre-press the garment.
- Pre-press the shirt for five to seven seconds. This drives out moisture, which is the number one cause of failed adhesion. A damp hoodie will sabotage an otherwise perfect transfer.
- Set the press around 150 to 160 degrees Celsius. Hotter is not better. Too much heat can distort the film and cause the adhesive to bleed past the ink edges.
- Use firm, even pressure for ten to fifteen seconds. Medium pressure on a manual press usually means the handle is fully down and locked. Inconsistent pressure shows up as patchy adhesion on one side of the print.
- Peel cool or warm, not hot. A warm peel is more forgiving on stretchy fabrics. If the film fights you and the ink looks stringy at the edges, let it cool a few more seconds.
- Post-press with a cover sheet for five seconds. This final pass smooths the texture and pushes the adhesive deeper into the fibers. It is the step most people skip and the one that most improves wash durability.
The pressure mistake I made for months
My early failures were almost all pressure related. I was pressing light because I worried about flattening the fabric, and the result was transfers that looked fine on the table and started lifting at the corners after one wash. Once I started locking the handle down fully and pre-pressing every garment, the failure rate dropped to near zero. If you are troubleshooting peeling, check pressure before you blame the film.
Storage, Handling, and Waste
Cured film is fairly forgiving, but it is not indestructible. Store sheets flat or in a folder, away from heat and direct sun. Stacking heavy objects on top of a loose pile can crease the adhesive layer, and a crease will show up as a visible line in the finished print.
Powder management is the other housekeeping item. A shaker bottle with a fine mesh, a tray to catch the excess, and a dedicated space away from air vents will keep your workspace from turning into a dust bowl. Used powder can be sifted and reused if it has not picked up lint or moisture, which matters when you are printing a lot of small designs.
When to Recommend DTF to a Customer
Customers rarely ask for a specific process. They ask for a look, a quantity, and a deadline. Translating that into a recommendation is where a shop earns trust.
If someone wants twenty hoodies with a full-color mascot, dtf transfers are the obvious call. If they want three hundred single-color tees for a company event, screen printing will be cheaper and feel softer. If they want names and numbers on the back of jerseys, DTF handles the fine detail better than most vinyl cutters. Being honest about those boundaries, rather than pushing whatever you have loaded, is what brings the order back next season.
Frequently Asked Questions
How many washes should a DTF print survive?
A properly applied transfer on a compatible fabric typically holds up for fifty or more home wash cycles. Turning the garment inside out and washing cold extends that considerably. Peeling within the first few washes almost always points to moisture in the garment, insufficient pressure, or a skipped post-press.
Can DTF transfers go on polyester and nylon?
Yes, but heat tolerance varies. Lower the press temperature and shorten the dwell time on synthetics, and always test on a scrap first. Some coated nylons need a cooler peel to avoid distorting the film.
Do I need a dedicated DTF printer, or can I buy pre-printed transfers?
Plenty of shops never buy a printer. Ordering pre-printed films by the sheet lets you test demand and press on demand without the maintenance of an ink system. Once volume justifies it, bringing printing in-house makes sense.
What is the difference between DTF and DTG?
DTG prints directly onto the garment, which limits it mostly to cotton and ties the print to the shirt from the start. DTF prints onto film first, so you can store designs, apply them to many fabric types, and press them wherever and whenever you need them.
Why does my transfer look grainy after pressing?
That texture is uncured adhesive powder. Increase the curing time or temperature on the film, and make sure you are shaking off excess powder before curing rather than after. A cover sheet on the final press pass will also smooth the surface noticeably.